
Ski touring combines the thrill of skiing with the serenity of hiking through snow-covered mountains, giving access to untouched slopes and breathtaking scenery. But for beginners, backcountry skiing can be full of pitfalls — from gear malfunctions to technical errors. Here are 15 essential tips to help you prepare properly, stay safe, and enjoy every moment of your first ski tour.
Why ski touring is challenging for beginners
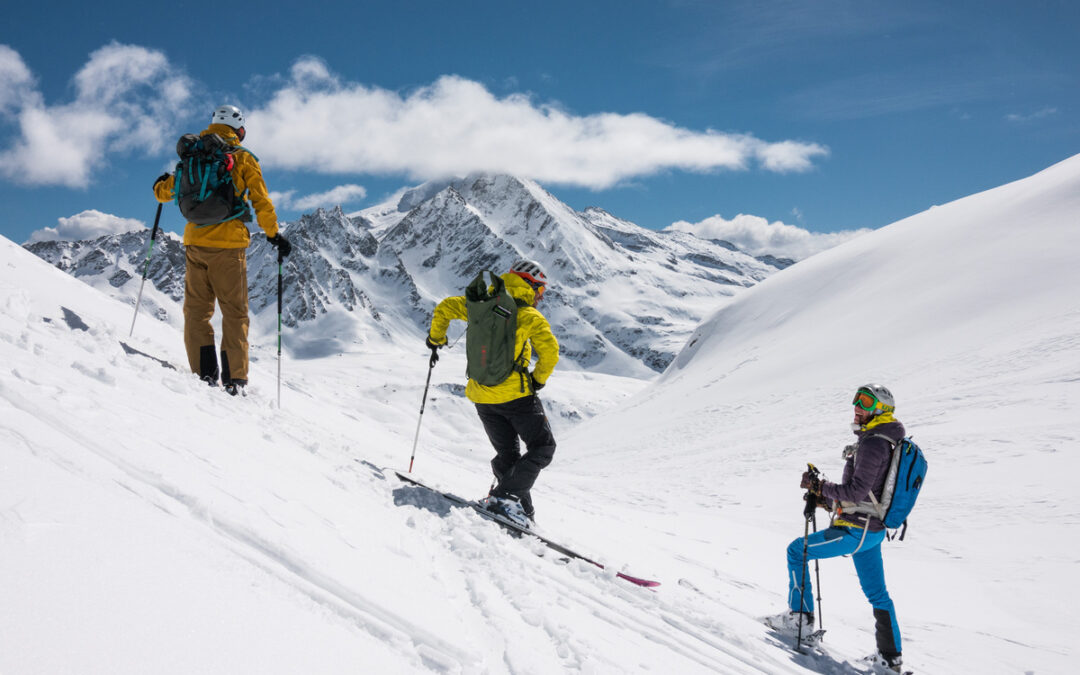
Unlike resort skiing, ski touring is a self-supported journey through wild terrain. You carry everything on your back, manage your own safety, and must adapt to changing weather and snow conditions. Mistakes like forgetting gear, dressing incorrectly, or mishandling skins can turn a dream trip into a struggle. With proper planning and awareness, these challenges become part of the fun.
1. Check your gear the night before
Broken poles, frozen bindings, or missing skin clips can ruin your day. Inspect all your ski touring gear at home — skis, climbing skins, bindings, poles, boots. Bring a basic repair kit with duct tape, a multitool, ski straps, and spare screws. Prevention saves time and nerves on the mountain.
2. Make a gear checklist
A forgotten item can compromise your safety. Use a checklist: skis, boots, skins, avalanche transceiver, probe, shovel, layers, gloves, food, water, first aid kit. Review it every time before heading out. A light, well-packed backpack is your best friend on a long ascent.
3. Apply skins in a warm space
Climbing skins work best when applied in warm, dry conditions. Do this indoors before your tour. Cold or wet skis reduce glue adhesion. Never store skins on skis overnight — it damages both the glue and base. In the morning, double-check skin clips and tail attachments.
4. Dress in layers and manage heat
Ski touring is highly aerobic — you’ll alternate between sweating and cooling down. Use moisture-wicking base layers, a light fleece or midlayer, and a breathable shell for wind and snow protection. Pack a lightweight down jacket for rest stops and emergencies. Adjust layers on the go to stay comfortable and dry.
5. Use lightweight gloves on the ascent
Thick gloves overheat your hands and make it hard to handle gear. Opt for thin, windproof gloves with grip and touchscreen compatibility. Carry warm ski gloves for the descent and an extra pair in case of wet conditions. Cold, wet hands lead to blisters and fatigue fast.
6. Eat and drink consistently
Ski touring burns 600–1,000+ calories per hour. Start with a hearty breakfast: oats, eggs, or protein-rich foods. Snack every 1–2 hours with nuts, energy bars, or dried fruit. Stay hydrated with water or isotonic drinks — cold air dehydrates you more than you realize. Avoid heavy meals mid-tour that can slow you down.
7. Keep your phone warm
Your smartphone is your GPS, camera, and emergency contact tool — but batteries die fast in the cold. Store it in a chest pocket close to your body. Limit use to navigation only. Bring a compact power bank. In extreme cold or whiteout conditions, a physical GPS or map is more reliable.
8. Practice smooth transitions
Transitioning between uphill and downhill — removing skins, locking boots, adjusting clothes — should be fast and smooth. Practice your routine at home until it’s automatic. Create a sequence: skins off → boots to ski mode → add shell layer. A good transition saves time and keeps your group moving.
9. Keep skins warm between climbs
If you’re doing multiple ascents, store your skins under your jacket or in an inner pocket during descents. Cold glue doesn’t stick. Clear snow and moisture from skis before reapplying skins. Some jackets have dedicated skin pockets — use them if available.
10. Use adjustable poles
Terrain varies. Telescopic poles let you adapt the length for ascents, descents, and traverses. Look for poles with extended grips for quick hand position changes. If not, wrap ski straps below the grip for makeshift choke zones. It makes steep traverses and variable terrain easier.
11. Bring at least 4 ski straps
Ski straps are essential. They fix broken gear, hold skins in place, and are useful in rescue scenarios. Strap together broken bindings, boots, or even build emergency sleds. Wrap a few around your poles for easy access. They’re lightweight and incredibly versatile.
12. Wax for spring conditions
In spring, wet snow can stick to skins and slow you down. Rub a small block of wax on skins and ski bases to prevent snow buildup and improve glide. You can also use waterproofing spray for skins. Do this before the tour and monitor snow conditions throughout the day.
13. Include blister tape in your first aid kit
Even well-fitted boots can rub raw during a long day. Blisters will ruin your tour. Carry wide blister tape and apply it immediately at the first sign of discomfort. Don’t tough it out — small pains become big problems fast in the backcountry.
14. Always bring toilet paper
Nature doesn’t wait. A few meters of toilet paper in a sealed plastic bag is a must. It takes up no space but can save your dignity and comfort.
15. Think twice before giving advice
Newcomers can be overwhelmed. Avoid giving unsolicited advice on the trail. Offer help only when asked or when safety is at stake. Save feedback or teaching moments for après-ski — over a warm meal and relaxed vibes.
Final Thoughts
Your first ski tour can be one of the most rewarding experiences in the mountains. With the right preparation, a calm mindset, and the ability to learn as you go, ski touring becomes not just a sport — but a lifestyle. These 15 tips are just the beginning. Stay humble, stay safe, and enjoy the wild beauty of winter.
0 Comment